

Have you ever wanted to make your own development board, with full control over the hardware and software design process? This article is the first in a series thta focuses on designing and implementing a system based on AVR ATMega microcontrollers from scratch, from powering the chip itself, to installing tools and compiler, to writing actual firmware.
The reason why I started approaching programming and computer engineering many years ago was that I wanted to know every detail of how a computer works, and, in this series, I hope to share a small part of that journey.
The project
I want to build a simple board based on an ATMega microcontroller, starting with a breadoard, the MCU chip, and some other component. Once everything is set, it will then be easy to extend the board to whichever use case we want to use it for.
Something that I am interest in is also having control over the development tools: I do not want to use an IDE with an esoteric build system, that may hide some aspects of the build process. Instead, I want to have as much control as possible, using a modern editor and a build system based on makefiles (with or without CMake).
Luckily enough, open-source support for the AVR MCU architecture (ATMega MCUs are AVR chips) is top-notch: the GNU project provides an implementation of the gcc compiler and gdb debugger for AVR targets, while the github org avrdudes mantains a nice avr-libc implementation, together with one of the coolest tools for programming chips: avrdude.
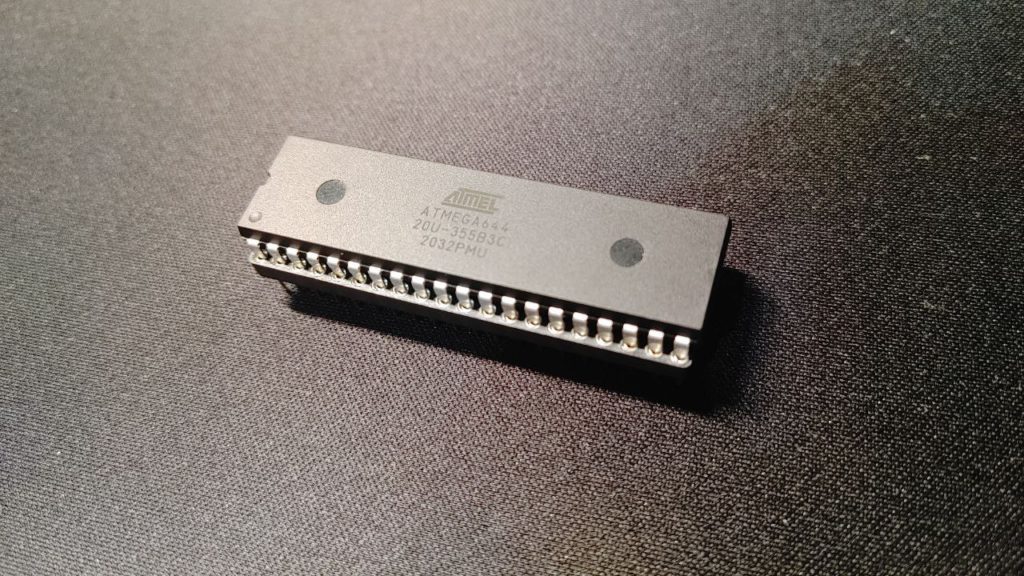
I chose an ATMega644 as the microcontroller to use, but any other ATMega chip with flash memory within 128K will be ok. The reason why I say so is that these chips are available in the PDIP through hole package, which makes them easy to use on a breadboard.
The AVR development environment
I generally use one of the following two options when I have to develop software for embedded targets: either VScode/codium or JetBrains CLion. I will focus on the first one since its free and more ore less open software.
There are different ways of setting up the compiler and the tools that are needed, depending on the machine you are working on and your operative system. I am using an x86_64 intel i7 with Ubuntu 20.04, but you can use whichever environment you usually have on your computer.
Installing GCC, etc. on Linux Ubuntu through apt
Everything we need to setup the environment can be found through apt:
sudo apt install gcc-avr gdb-avr avrdude avr-libc
The only problem is that the compiler version available through apt is quite dated. To fix this problem I will propose an alternative way of installing it in the next paragraphs, by compiling gcc ourselves.
Even if it is a bit dated, if you do not want to compile gcc, the compiler is more than ok for what we want to accomplish. If you would like to also use CMake, it is possible to get it from apt too, or you can install a newer version by adding the Kitware apt repository (Ubuntu 16/18/20 only), by following the instructions on their webpage.
Installing GCC, etc. on Windows (Mingw64/MSYS2) through pacman
A simple way of installing an environment that can be used to compile stuff on Windows is touse MSYS2, available at this link. MSYS2 is made of a set of libraries and utilities that include the pacman package manager. By using the mingw64 package repository, we can install what we need:
pacman -S mingw-w64-x86_64-avr-binutils \
          mingw-w64-x86_64-avr-gcc \
          mingw-w64-x86_64-avr-gdb \
          mingw-w64-x86_64-avr-libc \
          mingw-w64-x86_64-avrdude
Once that is done, you have to add the MSYS2 and the mingw64 bin directories to the PATH environment variable, so that these binaries can be visible from the outside, and can be detected by VScode. Suppose that MSYS2 is installed within C:\msys64, then the following directories must be added to PATH:
c:\msys64\usr\bin
c:\msys64\mingw64\usr\bin
CMake can also be installed directly from the mingw64 package repository:
pacman -S mingw-w64-x86_64-cmake
Compiling GCC and friends from source using docker
If you want to have more recent versions of avr-gcc, avr-binutils and avr-libc, you will have to compile them from source, but fear not: I made made a docker environment that compiles everything for you, so that you do not have to install dependencies or anything directly on your machine. Just see for yourself that what is built is ok with you!
You can find this environment in our antima github org @github/antima/avr-gcc-env. In order to start the process, you will have to decide which versions of the three suites you are interested in. For example, this is the way I set up my environment:
git clone https://github.com/antima/avr-gcc-env
docker build \
	--build-arg BINUTILS_VERSION=2.38 \
	--build-arg GCC_VERSION=11.3.0    \
	--build-arg LIBC_VERSION=2.1.0    \
	-t avr-gcc-env:11.3.0-binutils-2.38-libc-2.1.0 .
docker run --rm -v $(pwd)/avr-env:/local/avr avr-gcc-env:11.3.0-binutils-2.38-libc-2.1.0
This will take a bit of time depending on your cpu. Once it’s finished, the environment will be available within the avr-env directory contained in the cloned repo.
Now you can move the avr-env/avr directory to whichever position you’d like on your filesystem (I generally use ~/.local), and make your PATH point to avr-env/avr/bin.
VScode/codium setup
VScodium is the telemetry-free, MIT-licensed version of VScode, and it’s my go.to solution between the two, but you may use whichever without any differences. I talked previously about this environment on an article in antima.
You will mainly need three plugins, which can be found directly from the MarketPlace inside vscode:
- CMake/CMake tools, to have CMake support and syntax-highlighting.
- clangd, for code-completion, contextual searches and in-editor errors/warnings.
- Native Debug,so that we can debug in-editor using gdb.
Makefiles or CMake?
This can be a personal issue or something tied to having different people working on a project, but I generally like to just use a simple Makefile for a smallish project where I am on a unix-like system, developing on my own or with other people on similar systems.
At the same time, it is nice to have CMake when you are working on multiple systems and you must have cross-platform compatibility. In the end you can always use CMake to generate make-based projects, and you have nice IDE/editor compatibility as a plus.
Whichever tools you prefer, you can find a repo on our github containing a project template that supports any of the two. I will use this as a minimal project tree an advise you to do the same. It has a simple structure with an inc directory where to put header files and src directory where to put source files. The make/CMake scripts are also quite intuitive to modify if you wish so.
You can find the template @github/antima/avr-template.
A simple “hello world”
int main(void) {
    for(;;) {
        __asm("NOP");
    }
}
This minimal code example does nothing, but it does it in style: it’s only here to test that our setup works correctly. Create a main.c file in /src and copy this excerpt inside of it.
Compiling using make
Before we dive into compiling our example, we must first address a couple of details that must be finalized within the Makefile script. You have to specify which chip your are using and its clock frequency, alongside with a project name of your selection.
The first two options can be set within this block:
# MCU configuration
# Set MCU type, clock frequency and programmer
MCU=
CLOCK_FREQ=
PROG_STR=atmelice
# MCU configuration
# Set MCU type, clock frequency and programmer
MCU=atmega644
CLOCK_FREQ=1000000
PROG_STR=atmelice
avrdude -p ?
The third setting to modify can be found is on line 22 (the default value is “template_project”),which will name the compilation artifacts:
# Project configuration
PROJ_NAME=template_project
PROJ_BLD=$(BUILD_DIR)/$(PROJ_NAME)
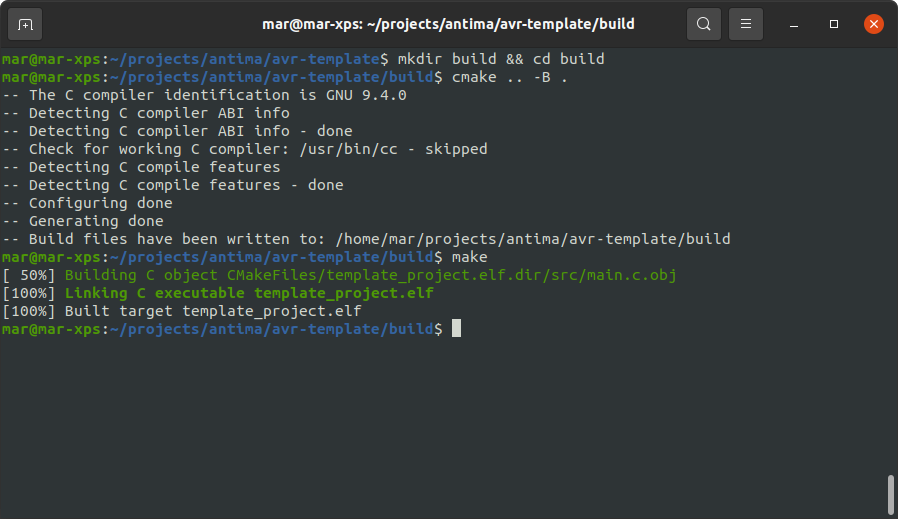
We can now compile this incredibly minimal project using make, by opening a terminal in the cloned root directory, and executing:
make
Once the process ends, you will see a build directory appear, whihc will be ignored by git, where you will find the compiled object files and three compilation outputs: a .elf file, a .hex file and a .bin file.
Compile using CMake + make/ninja
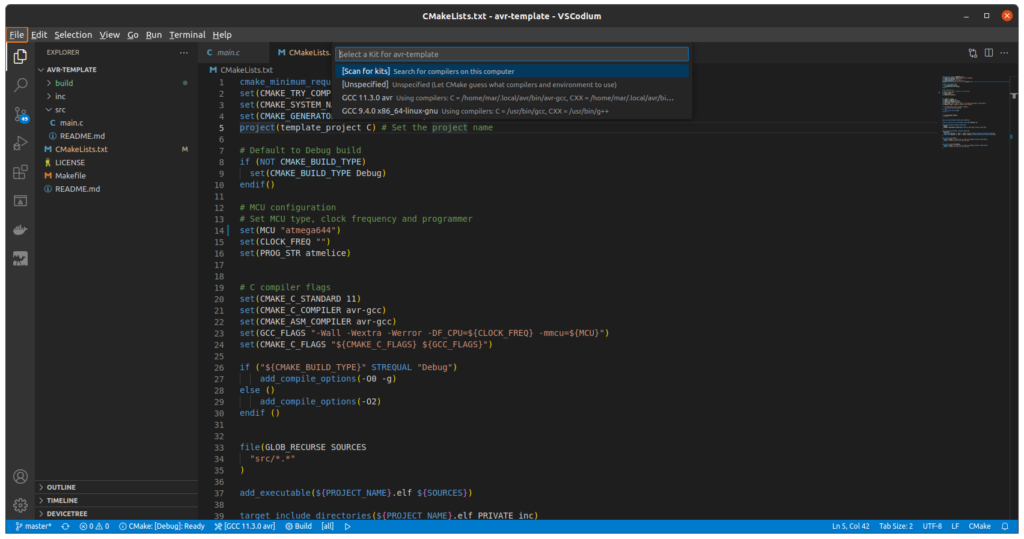
If you want to use CMake to generate your build system, you have to first configure the CMakeLists.txt file by modifying the same settings present in the Makefile.
project(template_project C) # Set the project name
# MCU configuration
# Set MCU type, clock frequency and programmer
set(MCU "")
set(CLOCK_FREQ "")
set(PROG_STR atmelice)
mkdir build && cd build
cmake .. -B .
make
ninja
VScodium integration
The small detail that links the control-driven approach to the comfort of a modern development environment is integrating CMake with VScodium. In order to set up the project through CMake, you just have to open the cloned template project with Vscodium and follow the instructions. To do so, it’s important that you exported the bin folder containing avr-gcc & friends into the PATH.
Now that the environment is ready, what are we going to implement? In the next few articles I will go into more detail regarding the chosen MCU, how to power it up and how to interact with it.
For now that’s all, I hope you enjoyed the article and feel free to leave a comment below if you have any questions or want me to elaborate on any detail!